


Photography has come a long way with the advancements in mobile apps that allow users to enhance their photos with ease and precision. If you’re a photographer, content creator, or simply someone who loves capturing stunning images, you know that editing plays a pivotal role in making your photos stand out. While many editing tools exist, Adobe Lightroom has become a go-to app for those looking to take their mobile photo editing to the next level. But as with any powerful tool, there’s always more to learn in order to master it.
In this guide, we’ll dive into the Lightroom mobile editing tips that can help you unlock the full potential of this amazing app. Whether you’re a beginner looking to get started or an advanced user aiming to perfect your editing skills, we’ve got tips that will suit your needs. From essential features to expert techniques, this article is packed with everything you need to know to enhance your mobile editing game.
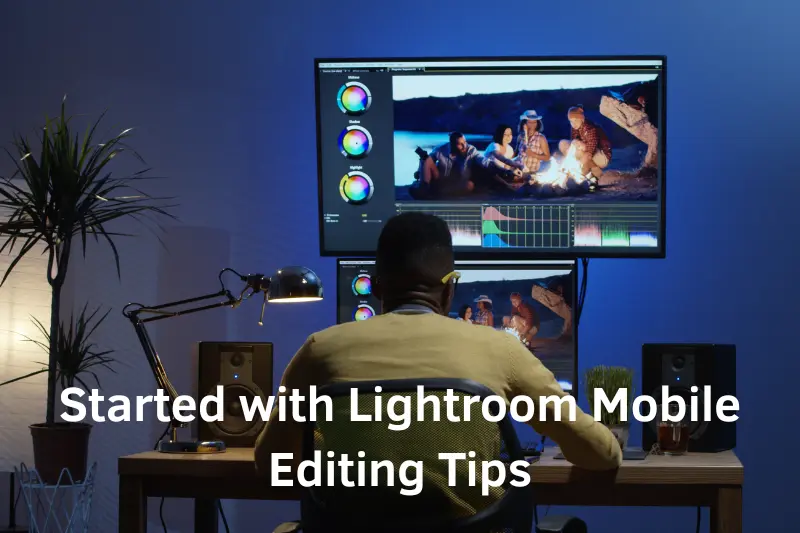
1. Started with Lightroom Mobile Editing Tips
If you’re new to Lightroom on mobile, it’s important to start with the basics. The app offers a simple yet powerful interface that allows users to edit their photos like professionals. Here’s how you can get started:
- Download Lightroom Mobile: The app is available for both iOS and Android devices, and the best part is that it’s free to download. However, for advanced features, you may need to subscribe to Adobe’s Creative Cloud.
- Understanding the Interface: Once you’ve opened the app, you’ll find various panels on the screen, including the Library, Develop, and other tools like Presets and History. Familiarize yourself with these sections to get the most out of your editing session.
Basic Features You Should Know:
- Crop Tool: Adjust your image’s dimensions and orientation for the perfect composition.
- Exposure Control: Fine-tune the brightness of your photo with the exposure slider.
- Contrast: Adjust how light and dark areas in the photo interact, adding depth.
- White Balance: Control the temperature and tint for a more natural or artistic look.
By getting comfortable with these basics, you’ll be ready to start enhancing your photos with more advanced techniques.
2. Basic Editing Tips for Beginners
When you’re starting out with Lightroom mobile, focusing on these core editing tools will set the foundation for more advanced editing:
Exposure & Contrast:
- Exposure: Control the overall brightness of your photo.
- Contrast: Adjust the difference between the lightest and darkest areas of your image. Increasing contrast can give your photos more depth, while lowering it can create a softer effect.
White Balance Adjustments:
Getting the correct white balance ensures that your photo has accurate colors. Use the temperature slider to make your photos warmer or cooler depending on the mood you want to create.
Cropping & Straightening:
- Use the crop tool to adjust your composition and aspect ratio.
- The straighten tool helps fix tilted photos.
3. Advanced Lightroom Mobile Editing Tips
Once you’re comfortable with the basics, it’s time to dive deeper into the more advanced features that Lightroom offers. These tools can help you add a professional touch to your photos.
Tone Curve:
The Tone Curve gives you control over your photo’s contrast at a more granular level. You can adjust the shadows, midtones, and highlights to create a unique look that aligns with your creative vision.
Color Mix:
- Saturation: Increase or decrease the intensity of specific colors in your photo.
- Hue: Adjust the hue of specific colors to create a different tone or style.
Split Toning:
Add color to the shadows and highlights of your photo, giving it a cinematic or artistic feel. This technique is often used in portrait and landscape photography to add mood.
4. Using Presets to Speed Up Your Editing
Presets are pre-made editing settings that you can apply to your photos with a single click. Lightroom mobile comes with several built-in presets, and you can also create or import your own. Here’s how presets can save you time:
- Speed Up Workflow: With a preset, you can apply a consistent look across multiple photos in just a few clicks.
- Experiment with Styles: Presets allow you to experiment with various looks and styles, from bright and vibrant to moody and dark.
How to Create Your Own Preset:
- Make adjustments to a photo that you like.
- Tap on the three dots in the upper-right corner and choose “Create Preset.”
- Name your preset and choose which settings you want to save.
5. Mastering Color Grading on Lightroom Mobile
Color grading is the process of adjusting the colors in your photos to set a certain mood or tone. It’s an essential skill for professional photo editing. Here’s how you can master color grading in Lightroom mobile:
Working with the HSL Panel:
The HSL (Hue, Saturation, Luminance) panel is where you can fine-tune individual colors in your photo. You can adjust:
- Hue: Change the color of a specific area.
- Saturation: Increase or decrease the intensity of a color.
- Luminance: Adjust how bright or dark a color appears.
Using Split Toning:
Apply different colors to your shadows and highlights, allowing for more dramatic effects and creative freedom.
6. How to Use Masks and Local Adjustments
One of the most powerful features of Lightroom mobile is the ability to make localized adjustments using masks. Here’s how you can take advantage of this tool:
Creating a Mask:
- Tap the “Mask” button and choose the area you want to adjust, such as the subject or the sky.
- Use the brush tool, gradient, or radial filters to apply adjustments only to the selected area.
Local Adjustments:
Once you’ve created a mask, you can adjust exposure, contrast, sharpness, and other settings specifically within that area of the photo. This technique is great for highlighting certain parts of an image or fixing exposure problems in specific areas.
7. Working with RAW Files in Lightroom Mobile
Working with RAW files allows you to preserve all the details in your photos, making it easier to adjust exposure, white balance, and other settings during editing. Lightroom mobile supports RAW editing, which gives you a significant advantage in terms of editing flexibility.
Advantages of Editing RAW:
- Higher Quality: RAW files have more information, allowing for more detailed adjustments.
- Better Control: You can push shadows, highlights, and exposure further than you could with JPEGs.
How to Import RAW Files:
- Ensure that your phone has enough storage to handle RAW files, as they can be quite large.
- Import the files directly from your phone’s gallery or camera roll into Lightroom.
One read, and you’ll see things differently!
Best Lightroom Presets for Portraits Elevate Your Photograph
Lightroom Photo Editing Tutorial: Master Your Photos Now
How to Use Adobe Lightroom for Beginners Start Editing Today
8. Mobile Editing for Social Media

If you’re editing for social media, there are specific adjustments that can make your photos stand out and perform better online. Here’s what you should focus on:
- Aspect Ratio: Choose the ideal aspect ratio for the platform you’re posting on (e.g., 4:5 for Instagram, 16:9 for YouTube thumbnails).
- Vibrant Colors: Boost saturation and contrast to make your images pop in feeds.
- Sharpening: Lightly sharpen your photos to ensure they look crisp on smaller screens.
9. Troubleshooting Common Issues in Lightroom Mobile
Even with a powerful app like Lightroom, users occasionally face some challenges. Here are a few common issues and solutions:
- App Crashes: If the app keeps crashing, try clearing the cache or reinstalling it.
- Slow Performance: Make sure you have enough storage space on your phone, as Lightroom can be demanding on resources.
- Photo Export Issues: If you can’t export your photos, ensure you’re connected to the internet, especially for cloud syncing.
Conclusion
Editing photos on mobile has never been more powerful and accessible, especially with tools like Lightroom. By applying the Lightroom mobile editing tips in this article, you can elevate your photography to new heights. Whether you’re a beginner learning the basics or an expert fine-tuning every detail, Lightroom offers a wealth of features that can help you create stunning, professional-grade photos on your mobile device. Start experimenting today and watch your images come to life!
FAQs
How do I get started with Lightroom mobile editing?
To get started, simply download the Lightroom mobile app from your device’s app store. Familiarize yourself with the basic tools such as exposure, contrast, and cropping, then experiment with editing your first photo to understand how each tool works.
Can I use Lightroom mobile to edit RAW files?
Yes, Lightroom mobile supports RAW file editing. This allows you to make more detailed adjustments, such as exposure and white balance, without losing image quality. Just ensure you have enough storage on your device to handle the large file sizes.
How can I speed up my Lightroom mobile editing process?
You can speed up your editing by using presets. These are pre-configured settings that can be applied to your photos with a single click, allowing you to quickly achieve a consistent look across multiple images.
Is Lightroom mobile good for social media photo editing?
Absolutely! Lightroom mobile is perfect for social media editing because it allows you to adjust colors, crop your images to fit specific aspect ratios, and sharpen them for better clarity on smaller screens.
Can I remove unwanted objects in Lightroom mobile?
While Lightroom mobile doesn’t have a dedicated “content-aware” tool like the desktop version, you can use the healing brush to remove small distractions from your photos, such as dust spots or blemishes, with decent results.


